The Nintendo Switch has been a hybrid console staple since 2017, and by 2026, millions of units have logged thousands of hours between handheld and docked modes. That much gaming takes a toll. Joy-Con drift, cracked screens, and battery degradation aren’t “if” problems, they’re “when” problems. Whether you’re looking to extend your console’s lifespan, tackle a DIY repair, or understand what’s under the hood before buying replacement parts, knowing the anatomy of your Switch is critical.
This guide breaks down every major component of the Nintendo Switch family, original model, OLED, and Lite, so you can identify what needs replacing, source the right parts, and decide whether to grab a screwdriver or send it to a pro. No fluff, just the details that matter when your console’s on the line.
Table of Contents
ToggleKey Takeaways
- Joy-Con drift is the most common Nintendo Switch parts failure, but replacement joystick modules ($5–$10) and soldering skills can fix it, or permanent Hall effect alternatives offer drift-free gaming.
- Battery degradation after 500–800 charge cycles (2–3 years) is a low-risk DIY repair requiring only basic tools, making it one of the most practical Switch maintenance tasks.
- Screen replacements and Nintendo Switch parts for docks, thermal paste, and kickstands vary by model—OLED, original, and Lite models use incompatible components, so always verify part compatibility before purchasing.
- Sourcing authentic replacement parts requires caution; reputable retailers like iFixit and eXtremeRate outperform generic Amazon listings, and quality parts cost $15–$100 depending on complexity.
- Motherboard repairs, liquid damage, and game card slot replacements require professional soldering skills and should be sent to experienced technicians rather than attempted as DIY fixes.
- Opening your Switch voids Nintendo’s warranty, but DIY repairs for Joy-Cons, batteries, and shells are low-risk; high-complexity work like component-level soldering can incur additional Nintendo service fees if damage occurs.
Understanding the Nintendo Switch Hardware Architecture
The Nintendo Switch runs on a custom NVIDIA Tegra X1 chipset (HAC-001 for the original, HAC-001(-01) for the revised 2019 model with improved battery). The OLED model (HEG-001) and Switch Lite (HDH-001) share similar architectures but differ in form factor and display technology.
At its core, the Switch is a tablet with detachable controllers. The main console houses the SoC (System on Chip), RAM, storage, battery, and cooling. The Joy-Cons communicate via Bluetooth and charge via the rail connection. The dock is essentially a USB-C hub with HDMI out and power delivery, it doesn’t contain additional processing hardware.
Understanding this modular design is key to repairs. Most failures happen in high-wear areas: analog sticks, battery cells, and thermal paste. The Switch wasn’t built with user serviceability in mind, Nintendo uses tri-wing and Phillips screws, ribbon cables, and adhesive, but the architecture is straightforward once you’re inside.
The original Switch shipped with a less efficient Tegra X1 (20nm process), while the 2019 revision moved to a 16nm process, nearly doubling battery life. The OLED model kept the same chip but upgraded the display and added a LAN port to the dock. The Lite removed the dock entirely, fused the controls, and trimmed the screen to 5.5 inches.
Essential External Components and Accessories
Joy-Con Controllers: Structure and Common Parts
Each Joy-Con contains an analog stick module, battery (525mAh), rail slider mechanism, button membranes, LED indicators, rumble motor (linear actuator), NFC reader (right Joy-Con only), IR camera (right Joy-Con only), and wireless radio. The joystick module is the most failure-prone part, it’s an ALPS RKJXV analog stick rated for around 400 hours before drift symptoms appear, though real-world results vary wildly.
The rail assembly uses a spring-loaded locking mechanism that wears over time, causing loose connections or charging issues. Replacement rails are widely available and require only basic disassembly. Button membranes, meanwhile, rarely fail but can be replaced individually if a specific input becomes unresponsive.
Joy-Con shells are modular and swappable, making custom colors a popular mod. But, the ribbon cables connecting the rail to the main PCB are fragile, one wrong pull and you’ll need a new ribbon cable or entire Joy-Con.
Dock Components and Functionality
The Switch dock is a plastic shell housing a USB-C connector, HDMI output, USB 3.0 ports (on original and OLED docks), and power delivery circuitry. The OLED dock added a built-in LAN port for wired internet, a long-requested feature.
Inside, the dock PCB is simple: it routes USB-C signals to HDMI and manages power. Third-party docks caused bricking issues in early firmware versions (particularly around system update 5.0 in 2018), but modern alternatives are generally safer. Still, using an official or well-reviewed third-party dock minimizes risk.
The dock’s USB-C connector can wear out with repeated insertions, leading to charging or video output failures. Replacement dock PCBs are available, though many users opt to buy a full replacement dock instead.
Internal Components of the Nintendo Switch Console
Main Processing Unit and Motherboard
The NVIDIA Tegre X1 SoC (Model T210) sits at the heart of the Switch, integrating a quad-core ARM Cortex-A57 CPU, quad-core Cortex-A53 CPU cluster, and a Maxwell-based GPU with 256 CUDA cores. It’s paired with 4GB of LPDDR4 RAM on the motherboard.
The motherboard (designated HAC-CPU-01 for the original Switch, HAC-CPU-10 for the 2019 revision, and unique boards for OLED and Lite models) also houses the game card slot, microSD reader, wireless modules (Wi-Fi 5 / Bluetooth 4.1), and power management IC. The game card slot is a common failure point, pins can bend or break with rough cartridge insertion.
Motherboard repairs are advanced-level work. Component-level soldering is required for game card slot replacement, and any damage to the SoC or RAM chips usually means the console is totaled. For most users, motherboard issues are a “send to a professional” scenario.
Display Screen and Digitizer Assembly
The original Switch and Switch Lite use a 6.2-inch and 5.5-inch LCD panel respectively, both with 1280×720 resolution and capacitive touch digitizer. The OLED model upgraded to a 7-inch OLED panel (1280×720) with richer colors and better contrast, though the resolution stayed the same.
The digitizer is bonded to the LCD (or OLED) with adhesive. Replacement requires heat, patience, and a steady hand. Pre-assembled screen+digitizer units are the easiest option for DIY repairs, though they’re pricier than digitizer-only replacements.
Screen damage usually comes from drops or pressure in a bag. Cracks in the digitizer can still allow the LCD to function, but touch input will fail. OLED burn-in is theoretically possible but rare, Nintendo implemented measures like screen dimming and pixel shifting to mitigate it. For gamers who leave static UI elements on-screen for hours, screen savers and periodic brightness adjustments help.
Battery and Power Management System
The original Switch uses a 4310mAh lithium-ion battery (HAC-003), the 2019 revision kept the same capacity but paired it with a more efficient chip, and the OLED model bumped capacity slightly to 4420mAh. The Switch Lite uses a smaller 3570mAh battery due to its compact form factor.
Battery health degrades after 500-800 charge cycles, which translates to roughly 2-3 years of regular use. Symptoms include rapid discharge, failure to charge, or the console shutting down at 20% battery. Battery swaps are one of the most common repairs, and while they require disassembly, they don’t involve soldering, just adhesive removal and connector replacement.
The power management IC (PMIC) on the motherboard regulates charging and power delivery. PMIC failures can brick the console entirely, and diagnosis requires a multimeter and circuit knowledge. Third-party chargers that don’t follow USB-C PD specs have historically caused PMIC damage, especially pre-2019. Stick with the official charger or certified alternatives that support 15V/2.6A output.
Cooling System and Thermal Components
The Switch’s cooling system is minimalist: a small axial fan, copper heat pipe, and aluminum heatsink pull heat away from the Tegra X1. Thermal paste between the SoC and heatsink degrades over time, leading to higher temps and thermal throttling (which tanks performance in demanding games like The Witcher 3 or Xenoblade Chronicles 3).
Replacing thermal paste is a popular mod among enthusiasts. High-quality paste can drop temps by 5-10°C under load. The fan itself rarely fails, but dust buildup is common, compressed air cleaning every 6-12 months keeps airflow optimal.
The Switch Lite uses a similar cooling design but with a smaller fan and heatsink. The OLED model’s cooling is nearly identical to the 2019 revision, as the SoC didn’t change. Overheating issues are more common in original 2017 units due to the less efficient chip.
Most Commonly Replaced Nintendo Switch Parts
Joy-Con Joystick Modules and Drift Issues
Joy-Con drift is the Switch’s most infamous hardware flaw. The ALPS RKJXV joystick modules wear down from normal use, causing phantom inputs, your character walks when you’re not touching the stick, or camera control becomes erratic. Nintendo faced a class-action lawsuit over this and eventually offered free repairs for affected Joy-Cons, even out of warranty.
Replacement joystick modules are cheap ($5-$10 per pair) and widely available. The repair involves removing the Joy-Con shell, desoldering the old module, and soldering in a new one, or using a drop-in replacement if you opt for a no-solder version (which sacrifices some durability). Many players with frequent drift issues find that swapping modules every 6-12 months is more practical than waiting for Nintendo repairs.
Third-party companies like GuliKit sell Hall effect joystick replacements that use magnetic sensors instead of potentiometers, theoretically eliminating drift entirely. These cost $20-$30 per pair but are considered a permanent fix by the modding community.
Screen Protectors and Replacement Screens
Tempered glass screen protectors are essential for any Switch owner. The console’s plastic screen scratches easily, especially when docking, as the dock’s interior can trap dust particles. A good protector costs $10-$15 and takes 30 seconds to apply.
Full screen replacements (LCD or OLED panel + digitizer assembly) run $50-$100 depending on the model. OLED panels are pricier and harder to source than LCD units. Installation requires removing the back shell, disconnecting the battery, and carefully removing adhesive without damaging ribbon cables.
For players who’ve cracked their screens, replacement is often more cost-effective than buying a new console, though OLED screen repairs approach the price of a used Switch, making the math tighter.
Battery Replacements for Extended Play Sessions
When your Switch won’t hold a charge past an hour or two in handheld mode, it’s battery replacement time. OEM batteries are available from various retailers, though quality varies, stick with sellers that offer Nintendo-branded cells or known third-party manufacturers like Cameron Sino.
Battery replacement is a 30-60 minute job with the right tools. You’ll need a tri-wing screwdriver, Phillips #00, plastic pry tools, and tweezers. The battery is adhered to the chassis, so heat or careful prying is necessary. Once the old battery is out, the new one connects via a simple JST plug.
Some users upgrade to higher-capacity third-party batteries (5000mAh+), though these require shell modifications and may not fit properly. For most players, sticking with OEM capacity is the safer bet.
Where to Source Authentic Nintendo Switch Replacement Parts
Official Nintendo Parts vs. Third-Party Alternatives
Nintendo doesn’t officially sell individual replacement parts to consumers, your options are sending the console in for repair or buying through third-party channels. Official parts harvested from broken consoles (“OEM pulls”) are available on eBay and specialized repair sites, but authenticity can be hard to verify.
Third-party parts vary wildly in quality. Generic LCD screens may have color accuracy issues or dead pixels. Knockoff batteries can lack safety circuits, risking swelling or fire. Joystick modules from reputable brands (GuliKit, eXtremeRate) are often better than Nintendo’s original ALPS modules, while no-name Amazon replacements might fail within weeks.
The rule: pay attention to reviews and seller reputation. If a part seems too cheap, it probably is. Expect to pay $15-$30 for a quality Joy-Con shell, $40-$70 for a good battery, and $50-$100 for screens.
Trusted Online Retailers and Marketplaces
For parts sourcing, these retailers are community-trusted:
- iFixit: Sells high-quality tools and some Switch parts, plus excellent teardown guides.
- eXtremeRate: Specializes in custom shells and buttons, ships worldwide.
- AliExpress: Cheap parts, long shipping times, inconsistent quality, read reviews carefully.
- eBay: Good for OEM pulls and hard-to-find parts, but verify seller ratings.
- Amazon: Convenient but flooded with rebranded generic parts, stick with brands that have solid review histories.
For batteries specifically, Cameron Sino and Green Cell are reliable third-party brands. For screens, look for sellers offering “A+ grade” or “original refurbished” panels. Communities on gaming hardware forums often share vetted supplier lists, which can save you from bad purchases.
DIY Repair Guide: Tools and Safety Considerations
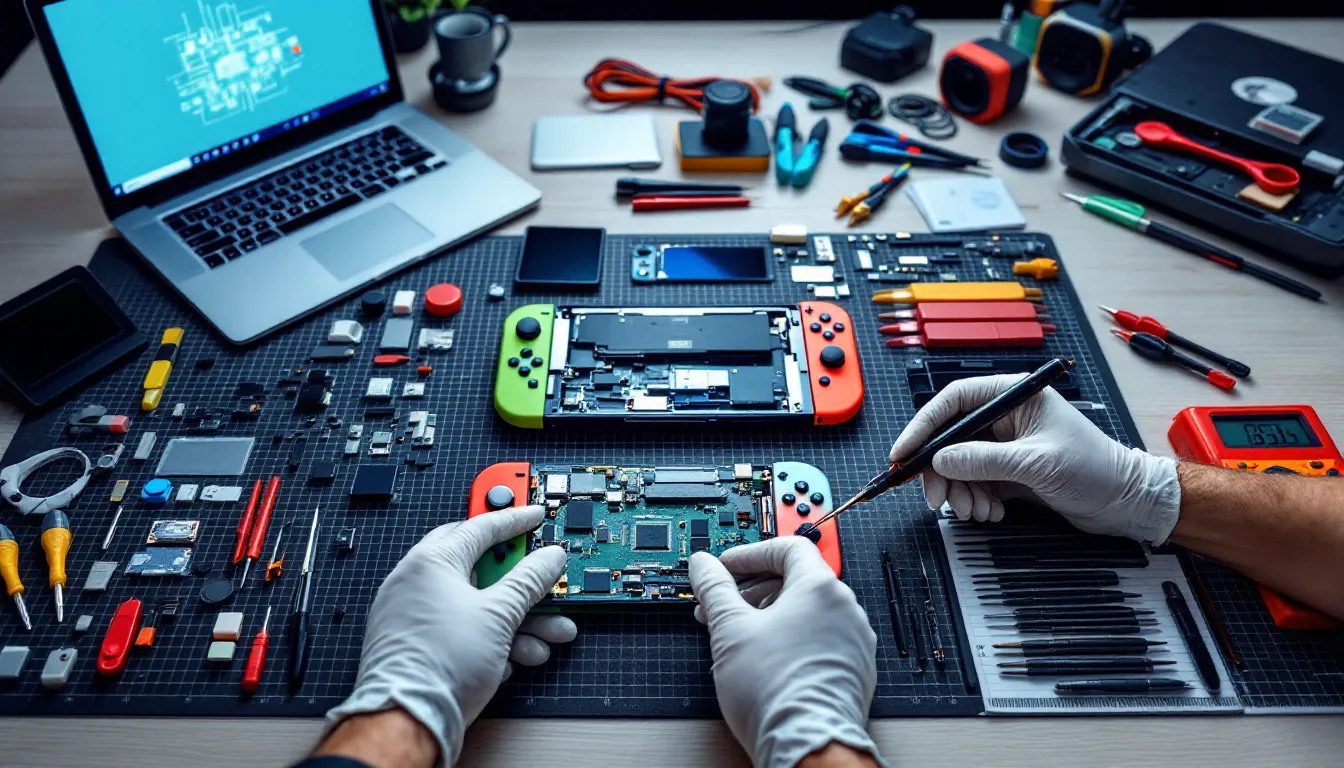
Essential Toolkit for Switch Repairs
You’ll need:
- Y00 tri-wing screwdriver (for Joy-Con and back panel screws)
- Phillips #00 screwdriver (for internal screws)
- Plastic pry tools and spudgers (metal tools will scratch or short components)
- Tweezers (for ribbon cable connectors)
- Heat gun or hairdryer (for adhesive removal on screens and batteries)
- Isopropyl alcohol (90%+) and microfiber cloths (for cleaning)
- Anti-static wrist strap (optional but recommended)
- Magnetic parts tray (keeps screws organized by size)
iFixit sells an all-in-one Switch repair kit for around $20-$30 that covers most needs. Cheap screwdriver sets from Amazon often strip screws, invest in quality bits.
Always disconnect the battery before working on internal components. The Switch’s ribbon cables are fragile, lift connector tabs gently, never pull cables by force. Work on a clean, well-lit surface, and take photos as you disassemble so you remember where each screw and cable goes.
When to Repair vs. When to Replace
DIY repairs make sense for:
- Joy-Con drift (joystick modules)
- Battery swaps (no soldering required)
- Shell replacements (cosmetic, low risk)
- Screen replacements (if you’re comfortable with adhesive and ribbon cables)
Send it to a pro or replace the console for:
- Motherboard issues (bent pins, damaged SoC, PMIC failure)
- Liquid damage (corrosion spreads, requires ultrasonic cleaning and component-level diagnosis)
- Game card slot replacement (requires soldering skills)
- OLED screen repairs (more expensive and delicate than LCD)
If your console is still under warranty or eligible for Nintendo’s free Joy-Con drift repair program, use that first. Out-of-warranty repairs from Nintendo cost $100-$150 for most issues, which is competitive with DIY parts cost if you factor in tools and time.
For players considering whether to tackle a console reset before diving into hardware repairs, software troubleshooting can sometimes resolve what looks like a hardware problem.
Nintendo Switch OLED and Switch Lite: Part Differences
The Switch OLED (HEG-001) shares most internal architecture with the 2019 Switch revision but diverges in a few key areas:
- Display: 7-inch OLED panel vs. 6.2-inch LCD. OLED screens are more expensive and harder to source.
- Kickstand: Wider, sturdier metal kickstand vs. flimsy plastic on the original. The kickstand assembly is a separate part and easy to replace.
- Dock: Includes a LAN port. The dock PCB is unique to the OLED model and not backward-compatible with older Switch docks for LAN functionality.
- Internal storage: 64GB vs. 32GB (eMMC storage soldered to the motherboard, not user-upgradeable).
- Battery: Slightly larger at 4420mAh vs. 4310mAh.
- Speakers: Improved audio output, but the speaker modules are similar in design.
The Switch Lite (HDH-001) is a different beast:
- No detachable Joy-Cons: Controls are soldered directly to the main board. Analog stick drift requires disassembly of the entire console and soldering.
- Smaller battery: 3570mAh vs. 4310mAh on the standard Switch.
- No dock support: No video output circuitry, no USB-C to HDMI capability.
- Smaller screen: 5.5-inch LCD, same resolution (720p).
- D-pad: Left side uses a proper D-pad instead of four buttons, requiring a unique button membrane.
Parts are not interchangeable between models. Joy-Con rails don’t exist on the Lite, OLED screens won’t fit in original Switch shells, and Lite analog stick modules require soldering directly to the board. Always verify part compatibility with your exact model number before ordering.
For gamers exploring other Switch system features, understanding the hardware differences helps contextualize why certain features (like TV mode) only work on specific models.
Warranty Implications and Repair Service Options
Opening your Switch voids Nintendo’s warranty. The console ships with a 12-month limited warranty covering manufacturing defects but not accidental damage or wear-and-tear issues like Joy-Con drift (though Nintendo has made exceptions for drift repairs due to the class-action settlement).
If your Switch is still under warranty, contact Nintendo support before attempting DIY repairs. They’ll cover manufacturing defects at no charge and ship a prepaid box for the console. Turnaround is typically 1-2 weeks.
For out-of-warranty repairs, Nintendo charges flat fees:
- Console repairs: $100-$150 depending on the issue
- Joy-Con repairs: Free for drift (as of 2026), otherwise $40 per Joy-Con
- Dock repairs: $60-$80
Third-party repair shops are a middle-ground option. Local game stores or electronics repair chains often handle Switch repairs for $50-$100 depending on complexity. They’re faster than Nintendo but quality varies, ask about parts sourcing (OEM vs. third-party) and warranty on repairs.
For players dealing with software issues alongside hardware concerns, resources on topics like resetting the console can help isolate whether the problem is fixable without parts replacement. Similarly, those experiencing performance issues while using online features may find that network configuration rather than hardware is the culprit.
Extended warranties from retailers like Best Buy or GameStop can be worth it if you’re buying a new console and plan to keep it for years. These typically cover accidental damage, which Nintendo’s warranty doesn’t.
DIY repairs don’t void your ability to pay for future Nintendo service, but if your repair causes additional damage (stripped screws, torn ribbon cables), Nintendo may refuse service or charge extra fees. Weigh the risks carefully, Joy-Con drift and battery swaps are low-risk, but motherboard work is high-risk.
Conclusion
The Nintendo Switch’s modular design makes it more repairable than most modern consoles, but it’s no Game Boy, precision and patience are required. Joy-Con drift remains the most common issue, and thankfully, it’s also one of the easiest to fix with the right tools and a $10 joystick module. Batteries degrade, screens crack, and thermal paste dries out, but each of these repairs extends your console’s life by years.
Source parts carefully, invest in quality tools, and know your limits. Some repairs save you money and downtime: others are best left to professionals. Whether you’re modding an OLED with custom shells or reviving a launch-day Switch with a fresh battery, understanding what’s inside your console gives you control over how long it lasts.
The Switch isn’t going anywhere soon, Nintendo’s still supporting it alongside the upcoming successor. Keeping your hardware in top shape means you’ll be ready for whatever comes next, whether that’s grinding through Tears of the Kingdom or jumping into the next big release. Repair smart, play longer.