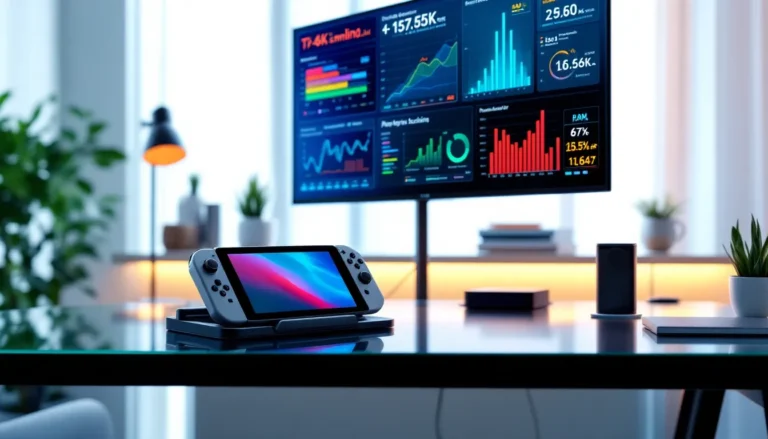

If you’ve ever wanted to share that clutch Smash Bros. comeback or stream your Tears of the Kingdom playthrough, you’ve probably run into the Switch‘s built-in capture limitations. Holding the capture button gets you 30 seconds of footage, great for quick clips, but useless for serious content creation. That’s where a capture card comes in.
A capture card bridges the gap between your Nintendo Switch and your PC, enabling full-length recording, live streaming to Twitch or YouTube, and professional-grade overlays. Whether you’re building a content channel or just want to save entire gaming sessions, understanding capture card technology is essential in 2026. This guide breaks down everything from choosing the right hardware to optimizing settings for pristine 1080p 60fps footage.
Table of Contents
ToggleKey Takeaways
- A Nintendo Switch capture card enables unlimited 1080p 60fps recording and live streaming, far exceeding the console’s built-in 30-second 720p clip limit.
- Choose between external USB capture cards ($80-300) for flexibility or internal PCIe models ($150-400) for peak performance, with the Elgato HD60 X offering the best overall performance at ~$199.
- Proper setup requires two HDMI cables, a USB 3.0 connection, and a PC with at least an Intel i5 processor and 8GB RAM to avoid quality degradation.
- Optimize your capture card by configuring OBS Studio for 1080p60 output, setting game audio to -12dB and microphone levels to -15-20dB, and using hardware encoding when available.
- Test audio sync, cable connections, and resolution settings thoroughly to prevent common issues like black screens, audio lag, and HDCP errors that can halt your streaming workflow.
- Consistency and content strategy matter more than production quality—establish regular streaming schedules and edit raw footage ruthlessly to keep viewer engagement high.
What Is a Capture Card and Why Do You Need One for Nintendo Switch?
A capture card is a hardware device that records or streams video output from a console to a computer. It sits between your Nintendo Switch dock and your display, intercepting the HDMI signal and passing it through to your recording software.
Understanding Capture Card Technology
Capture cards use either PCIe connections (installed inside a desktop PC) or USB connections (plug-and-play external devices) to transfer video data. The card converts the HDMI signal into a format your PC can process through software like OBS Studio, Streamlabs, or XSplit.
Modern capture cards support passthrough, meaning you can play on your TV or monitor with zero lag while the card simultaneously sends footage to your PC for recording. This is crucial, without passthrough, you’d be stuck playing through your computer screen with noticeable input delay.
The encoding happens either on the card itself (hardware encoding) or via your PC’s CPU/GPU (software encoding). Hardware encoding reduces the performance hit on your computer, which matters if you’re running resource-intensive games or streaming software simultaneously.
Nintendo Switch Built-In Recording vs. Capture Card
The Switch‘s native capture button offers limited functionality:
Built-in recording:
- Maximum 30-second clips
- 720p resolution only
- Supported in select titles (not all games allow video capture)
- No live streaming capability
- Stored on microSD card with file size limits
Capture card recording:
- Unlimited recording length (limited only by storage)
- Full 1080p 60fps when docked
- Works with every Switch game without restrictions
- Enables live streaming to any platform
- Professional editing capabilities
- Custom overlays, alerts, and multi-cam setups
For anyone serious about content creation, the choice is obvious. The built-in feature is fine for sharing quick moments on social media, but it can’t compete with what a proper capture setup delivers.
How to Choose the Right Capture Card for Your Nintendo Switch Setup
Not all capture cards are created equal, and buying the wrong one means either wasted money or compromised footage quality.
Internal vs. External Capture Cards
Internal (PCIe) capture cards install directly into your desktop’s motherboard. They offer the lowest latency and highest performance ceiling, with some models supporting 4K60 passthrough. But, they require:
- A desktop PC with available PCIe slots
- Comfort with opening your case and installing hardware
- More upfront investment ($150-400)
External (USB) capture cards connect via USB 3.0 or USB-C. They’re portable, work with laptops, and require zero installation. The tradeoff:
- Slightly higher latency (usually negligible)
- USB bandwidth limitations on older systems
- Price range from $80-300
For Switch streaming specifically, external cards make more sense unless you’re already running a multi-console setup that justifies internal hardware.
Key Specifications to Consider
When evaluating capture cards for Nintendo Switch in 2026, focus on these specs:
Resolution and frame rate: The Switch outputs 1080p 60fps maximum when docked, so your card needs to support at least that. 4K passthrough is useful if you’re sharing a setup with other consoles, but the Switch won’t benefit directly.
Passthrough delay: Look for cards advertising “zero lag” or “ultra-low latency” passthrough. Anything above 5ms becomes noticeable in fast-paced games. Many streaming equipment reviews test latency extensively, which helps filter out underperforming models.
Encoding type: Hardware-encoded cards (H.264/H.265) reduce CPU load significantly. If your PC is mid-range or you plan to stream demanding games from other platforms too, prioritize cards with onboard encoding.
Software compatibility: Verify the card works with OBS Studio, Streamlabs, or your preferred streaming platform. Most modern cards are plug-and-play with major software, but budget options sometimes have driver issues.
Audio handling: Ensure the card captures both HDMI audio from the Switch and separate microphone input. Some cheaper models struggle with audio sync or lack commentary track support.
Budget Considerations and Price Ranges
Capture card pricing breaks down into clear tiers:
Budget ($80-120): Entry-level USB cards with 1080p30 or 1080p60 capture. Passthrough quality varies. Expect basic software bundles. Perfect for casual recording and small-scale streaming.
Mid-range ($130-200): Reliable 1080p60 capture with solid passthrough, hardware encoding, and better build quality. This is the sweet spot for dedicated Switch content creators.
Premium ($200-400): Multi-platform support, 4K passthrough, advanced encoding options, and professional software suites. Overkill for Switch-only setups unless you plan to expand.
Don’t cheap out below $80, those cards often have HDCP issues, poor drivers, and frustrating bugs that’ll cost you hours of troubleshooting.
Top Capture Cards for Nintendo Switch in 2026
Here are the standout options based on performance, reliability, and value in early 2026.
Best Overall Performance
Elgato HD60 X remains the gold standard for external capture cards. It delivers flawless 1080p60 capture with less than 1ms passthrough latency, making it imperceptible even in competitive Smash or Splatoon 3 matches.
Key features:
- USB 3.0 connection (USB-C adapter included)
- VRR (Variable Refresh Rate) passthrough support
- Instant Gameview mode for near-zero delay monitoring
- Native compatibility with OBS, Streamlabs, and 4K Capture Utility software
- Price: ~$199
The HD60 X handles Switch footage beautifully and scales up if you add a PS5 or Xbox Series X later. It’s the card most established streamers recommend for good reason.
AVerMedia Live Gamer ULTRA (GC553) offers similar performance with 4K30 or 1080p120 capability. While the Switch can’t push 120fps, this future-proofs your setup. The onboard encoding is exceptional, barely touching your CPU even during intensive streams. Runs around $189-209.
Best Budget-Friendly Options
Elgato HD60 S+ (not the X model) sits at the budget-friendly $129-149 range while maintaining Elgato’s quality standards. It captures 1080p60 with HDR passthrough and works perfectly with the Switch’s output.
Limitations compared to premium options:
- Slightly older encoder chip (still very capable)
- No VRR passthrough
- Requires stronger PC specs for software encoding
For creators focused exclusively on Switch content who don’t need cutting-edge features, this delivers excellent value.
AVerMedia Live Gamer Portable 2 Plus ($139) includes standalone recording without a PC, footage saves directly to an SD card. This is clutch if you want to record on the go or don’t have a dedicated streaming computer. The tradeoff is no live streaming capability in standalone mode.
Best for Beginners
Razer Ripsaw HD ($159) wins for user-friendliness. The setup process is genuinely plug-and-play, with automatic driver installation and a simplified interface that doesn’t overwhelm newcomers.
What makes it beginner-friendly:
- Color-coded ports (impossible to plug cables wrong)
- Included quick-start guide actually makes sense
- Razer Synapse software handles settings automatically
- Mix-amp dial for instant audio balancing
The capture quality matches competitors at this price point, 1080p60 with clean passthrough and reliable encoding. It won’t intimidate first-time streamers while still offering room to grow into more advanced features.
Another solid beginner choice is the ClonerAlliance Flint 4KP ($99), which trades brand recognition for affordability without sacrificing core functionality. Setup takes five minutes, and the bundled software is surprisingly polished for the price.
Setting Up Your Nintendo Switch Capture Card
Getting your capture card running takes less time than beating a Zelda dungeon if you follow the right process.
Required Equipment and Cables
Before starting, gather:
- Nintendo Switch dock (obviously)
- Capture card (external USB or installed internal PCIe)
- Two HDMI cables (one from Switch dock to card, one from card to display)
- USB cable (usually USB-A to USB-C or USB 3.0, included with the card)
- PC or laptop with available USB 3.0 port and 8GB+ RAM
- Display (TV or monitor for passthrough viewing)
- Microphone (optional but recommended for commentary)
Cable quality matters more than you’d think. Cheap HDMI cables cause signal dropouts or prevent 60fps capture. Stick with certified High Speed HDMI cables rated for at least 10.2 Gbps.
Your PC specs impact capture quality significantly. Minimum recommended:
- Intel i5-6000 series / AMD Ryzen 5 or better
- 8GB RAM (16GB preferred for streaming)
- Dedicated GPU not strictly required but helps with encoding
- 50GB+ free storage for recordings
Step-by-Step Connection Process
This walkthrough assumes an external USB capture card (most common for Switch):
-
Power off your Switch and dock.
-
Connect the first HDMI cable from your Switch dock’s HDMI out port to the capture card’s HDMI input port. This is usually labeled “IN” and has an arrow pointing toward the device.
-
Connect the second HDMI cable from the capture card’s HDMI output port to your TV or monitor. This enables passthrough so you can play normally. The port is labeled “OUT” or “MONITOR.”
-
Connect the USB cable from the capture card to your PC’s USB 3.0 port. Blue USB ports indicate USB 3.0: avoid older USB 2.0 (black) ports as they lack sufficient bandwidth for 1080p60 capture.
-
Power on your PC first, allowing it to recognize the capture card. Most modern cards install drivers automatically. If prompted, approve driver installation.
-
Power on your Switch dock and TV/monitor. You should see your Switch home screen on your display as normal.
-
Launch your recording software (OBS Studio, Streamlabs, etc.) and add a new video capture device. Select your capture card from the device list. If it doesn’t appear, restart the software or check USB connections.
Common mistake: Plugging HDMI cables backward. The signal flows Switch → Card IN → Card OUT → Display. Reversing this gives you a black screen.
Configuring Your Recording Software
OBS Studio is free and industry-standard, so these steps focus on that platform:
Initial setup:
- Open OBS Studio and create a new scene
- Click the “+” under Sources and select “Video Capture Device”
- Name it (e.g., “Switch Capture”) and select your capture card from the Device dropdown
- Set Resolution/FPS Type to “Custom” and enter 1920×1080, 60fps
- Leave other settings at default initially
Audio configuration:
- In the same Video Capture Device properties, check “Use custom audio device”
- Select your capture card’s audio under “Audio Device”
- For microphone commentary, add an “Audio Input Capture” source separately
- Test levels using OBS’s audio mixer, game audio should peak around -12dB, mic around -18dB
Output settings:
- Navigate to Settings → Output
- For recording: Set Recording Format to MP4, Encoder to Hardware (if available) or x264, Quality to “High Quality, Medium File Size”
- For streaming: Choose your streaming service (Twitch, YouTube), set Video Bitrate to 6000 Kbps for 1080p60
- Set Recording Path to a drive with plenty of free space
Test a quick recording before diving into a full session. Many gaming setup tutorials walk through OBS troubleshooting if issues arise.
Optimizing Your Capture Card Settings for Best Quality
Default settings get you started, but optimizing them makes your footage actually look professional.
Resolution and Frame Rate Settings
The Nintendo Switch outputs different resolutions depending on mode:
- Docked mode: 1080p (1920×1080) at 60fps for most games
- Handheld mode: 720p (1280×720) at 60fps
Since capture cards only work with docked mode (handheld doesn’t use HDMI), always configure for 1080p60. Some older or less demanding Switch games run at 30fps, your capture card should automatically match this.
In OBS/Streamlabs:
- Set Base Canvas Resolution to 1920×1080
- Set Output Resolution to 1920×1080 (downscaling to 720p is acceptable if your upload speed is limited)
- Set FPS to 60 for maximum smoothness
Recording at higher bitrates than you stream prevents quality loss. For local recordings, use 15,000-20,000 Kbps bitrate. For streaming:
- Twitch: 6,000 Kbps max (non-partners)
- YouTube: 6,000-9,000 Kbps recommended
- Facebook Gaming: 4,000-6,000 Kbps
Encoder selection matters:
- Hardware (NVENC, QuickSync, VCE): Lower CPU usage, excellent quality, requires compatible GPU
- Software (x264): Higher CPU usage, slightly better quality at same bitrate, works without dedicated GPU
- Capture card hardware encoding: Offloads work entirely, best for older PCs
If your PC struggles during streams (dropped frames, stuttering), switch to hardware encoding or lower your output resolution to 720p.
Audio Configuration and Balancing
Poor audio ruins good footage faster than anything else. Here’s how to nail the mix:
Game audio levels: Switch game audio should be clearly audible but not overwhelming. Set it so dialogue and sound effects come through crisp without peaking (hitting 0dB and causing distortion). Aim for average levels around -12dB to -18dB.
Microphone levels: Your commentary should sit slightly above game audio in busy moments and match it during calm sections. Target -15dB to -20dB average. Add a noise gate filter in OBS (threshold around -35dB) to cut background hum.
Audio filters to apply:
- Noise Suppression: Removes background buzz and fan noise. Use RNNoise for best results.
- Compressor: Evens out volume spikes. Set Ratio to 3:1, Threshold to -18dB.
- Limiter: Prevents audio from clipping. Set Ceiling to -1dB.
Sync issues: If audio and video don’t match (lips moving before dialogue), adjust sync offset in OBS. Right-click your audio source → Advanced Audio Properties → Sync Offset. Add 50-100ms if audio leads video, or negative values if video leads audio.
Test your balance by recording a minute of gameplay with commentary, then watch it back. If you can’t hear yourself clearly over intense battle music, your levels need adjusting.
Troubleshooting Common Nintendo Switch Capture Card Issues
Even premium capture cards throw occasional tantrums. Here’s how to solve the most frequent problems.
No Signal or Black Screen Problems
Seeing a black screen in your capture software even though the Switch working fine on your TV? Try these fixes in order:
Check cable connections:
- Verify HDMI cables are fully seated in all ports
- Swap HDMI cables to identify faulty ones
- Test a different HDMI input on your capture card (if available)
- Ensure USB 3.0 connection (blue port) is secure
Resolution mismatch:
- Navigate to Switch Settings → TV Output → TV Resolution
- Manually set to 1080p (some cards struggle with Automatic)
- Set RGB Range to “Full” or “Limited”, test both
Software conflicts:
- Close other programs using the capture card
- Restart your recording software
- Update capture card drivers from manufacturer’s website
- Try a different USB port (preferably directly on motherboard, not a hub)
Power cycling:
- Unplug Switch dock power for 30 seconds
- Disconnect capture card USB
- Reconnect dock power first, then USB
- Launch software before turning on Switch
If none of this works, the HDMI port on your dock might be damaged, test the dock with a regular TV connection.
Audio Sync and Latency Issues
Audio arriving before or after video is jarring. This usually stems from buffering or processing delays.
For audio-ahead-of-video:
- Increase your capture card’s buffer size in device properties
- Add positive sync offset (100-200ms) to your audio source in OBS
- Enable “Use device timestamps” in capture device properties
For video-ahead-of-audio:
- Reduce buffer size
- Add negative sync offset (-50 to -150ms)
- Disable any “Fast Sync” or “Low Latency” modes temporarily to identify conflicts
Passthrough lag (delay between controller input and screen response) requires different fixes:
- Enable “Instant Gameview” or equivalent low-latency mode in capture card software
- Use the HDMI passthrough to your TV/monitor for gameplay, never play through the preview window in OBS
- Verify your TV/monitor has Game Mode enabled
Some older capture cards add unavoidable 30-60ms passthrough delay. If you’re playing competitive games like Smash Ultimate, this becomes noticeable. Upgrading to a card with true zero-lag passthrough solves it.
HDCP and Compatibility Errors
HDCP (High-bandwidth Digital Content Protection) can block capture cards from recording certain content. The Nintendo Switch generally doesn’t enforce HDCP for games, but occasionally:
Netflix, Hulu, or streaming apps trigger HDCP: The Switch activates copy protection for video streaming services. Capture cards can’t record this content by design. No workaround exists that doesn’t violate terms of service.
Specific games show “HDCP error”: Rare, but some third-party titles incorrectly enable HDCP. Solutions:
- Check for game updates (developers usually patch this quickly)
- Restart the game
- Try a different HDMI cable
- If the issue persists, it’s a game bug, report it to the publisher
“Unsupported signal” messages: Your capture card doesn’t recognize the Switch’s output format. This points to:
- Incompatible refresh rate (ensure Switch is set to 60Hz)
- Resolution the card can’t handle (unlikely with 1080p Switch output)
- Firmware mismatch, update both Switch system software and capture card firmware
Capture cards from reputable brands rarely have HDCP issues with Switch game recording. If you’re consistently hitting these errors with normal gameplay, the card might be defective.
Best Practices for Streaming and Recording Nintendo Switch Content
Having the hardware is one thing. Creating content people actually want to watch requires strategy.
Streaming Platform Requirements
Each platform has specific requirements and benefits for Switch streamers in 2026:
Twitch:
- Bitrate: 3,000-6,000 Kbps (6,000 max for non-partners)
- Resolution: 1080p60 or 720p60 (720p60 more reliable for viewers with slower connections)
- Latency: Low Latency mode enabled for better chat interaction
- Advantage: Largest gaming audience, best discoverability
- Drawback: Strict DMCA enforcement, ad requirements
YouTube Gaming:
- Bitrate: 6,000-9,000 Kbps recommended
- Resolution: 1080p60 preferred
- Latency: Normal or Low (test which works better with your connection)
- Advantage: VODs stay permanently, better monetization for small channels
- Drawback: Harder to build initial audience
Facebook Gaming:
- Bitrate: 4,000-6,000 Kbps
- Resolution: 720p60 or 1080p60
- Advantage: Easy to leverage existing social connections
- Drawback: Smaller gaming community compared to Twitch/YouTube
Test your upload speed before committing to a resolution and bitrate. Your bitrate should never exceed 70-80% of your upload bandwidth. If you have 10 Mbps upload, cap streams at 7,000 Kbps maximum to prevent buffering.
Overlay and branding tips:
- Keep overlays minimal, viewers want to see the game, not flashy borders
- Display recent followers/subs without blocking gameplay areas
- Use Switch-friendly layouts that don’t cover UI elements (health bars, minimaps)
- Add a webcam if comfortable, engagement increases significantly
For those building a Nintendo Switch content channel, consistency matters more than production quality initially. Streaming the same games at the same times weekly builds a returning audience faster than sporadic high-quality streams.
Creating Engaging Content with Your Footage
Raw footage rarely makes compelling content without editing. Here’s how to turn recordings into something worth watching:
For highlights and montages:
- Watch your full recording and mark timestamps for exciting moments
- Cut dead time ruthlessly, viewers will tolerate 15 seconds of context, not 3 minutes
- Use jump cuts between related clips to maintain pacing
- Add background music (royalty-free to avoid DMCA strikes)
- Include context text or voiceover explaining what makes the moment special
For tutorials and guides:
- Script your explanation before recording to avoid rambling
- Show each step in real-time first, then recap with text overlays
- Include chapter markers in video timeline for easy navigation
- Test your guide by having someone unfamiliar with the game follow it
For Let’s Plays and playthroughs:
- Edit out extended puzzle-solving unless it’s entertaining commentary
- Keep episodes 15-25 minutes for best retention (unless you have an established audience)
- Add preview of next episode at the end to encourage binge-watching
- Create custom thumbnails showing expressive reactions or interesting game moments
Footage organization:
Name your recording files systematically: 2026-03-24_TOTK_DungeonBoss_Take2.mp4 beats Capture_0847.mp4 when you’re hunting for specific clips three weeks later.
Store raw footage on an external drive. Hour-long 1080p60 recordings at high bitrate consume 10-20GB each. Your main drive will fill up fast.
Conclusion
A capture card transforms the Switch from a closed ecosystem into a content creation platform. Whether you’re documenting a Nuzlocke run, streaming competitive Splatoon 3 matches, or building highlight reels of your best Mario Kart moments, the right hardware and setup make the difference between frustration and professional-quality output.
The technology has matured to the point where even budget options deliver reliable 1080p60 capture, and setup takes minutes instead of hours. Focus on matching the card to your specific needs, casual recording needs different specs than daily streaming to thousands of viewers.
Most importantly, the capture card is just the tool. What you create with it depends on your content strategy, consistency, and willingness to learn both your equipment and your editing software. Start simple, test your setup thoroughly, and improve incrementally. The gaming community’s watching, give them something worth their time.